Tags

, ,

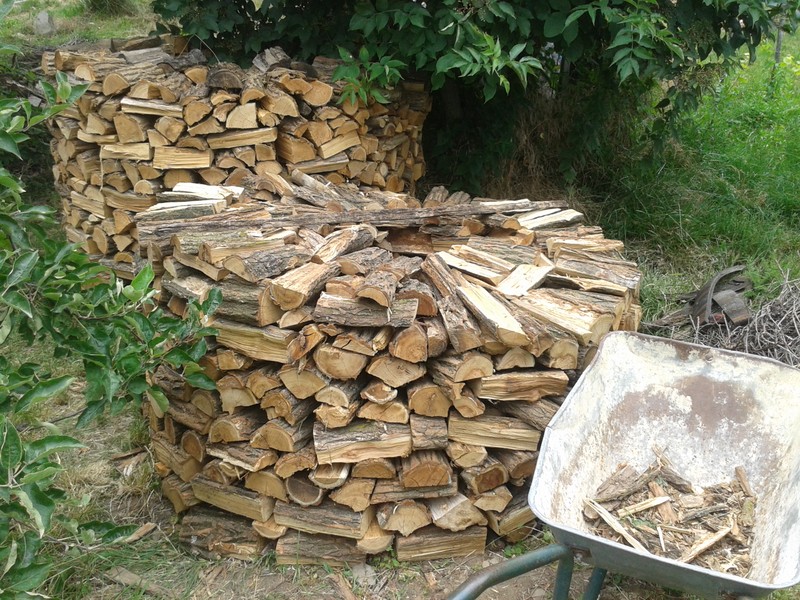
As anyone knows who follows this blog, we heat with wood. And for the past few years I have been stacking our firewood in round piles. There are many sites and videos one can find that describe this method in its various forms. And I have to say I agree with some of what is said about round piles and disagree about others. Some of my own building methods may help you also build stable and efficient piles for drying your own firewood.

  1. I do place on the ground rot resistant black locust poles as the base for the pile as this keeps the actual firewood off the ground as much as possible.
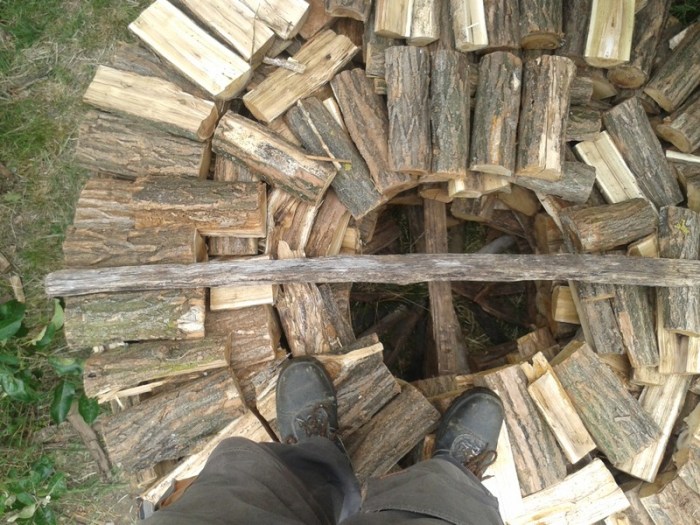
  2. I do add horizontal poles, at alternating 90 degree angles across the pile, as it is being build, to add stability and strength to the pile.
  3. I do stack the last layer with the wood turned bark side up where possible. This does help shed water off the stack during summer rains.
  4. I do not find stacking piles in the round to be faster than line stacking. At least not the way I do it, which is to interlock the wood together for stability. But I do it because it takes up less space, looks nice, while leaving no unsightly end stakes in the ground year round.
  5. I do not use a center pole to mark off the outer circle of the stack. The poles lying on the ground I mentioned above give an adequate measure for the outer ring circle.
  6. I do not fill the inner circle with wood as suggested by most sites that discuss this topic. I find leaving the center empty helps dry the wood by increasing air flow and summer heat to directly reach more of the wood surfaces.
  7. I do not create a little roof for the pile, and I do not cover the pile in any way during the summer. I am of the view that the hot sun directly on the wood will better dry the pile. I do cover the stack in the late fall, just before seasonal rains start, with tile or plastic and keep this cover on over winter.
This shows a closeup of how I interlock the wood within the pile. In the foreground is a log turned at a 90 degree angle to the others in the front, and you can see the wood log just to the upper left and right of this log in the front that are then placed across the boundary of the inner and outer circle of logs. This inner log helps lock the inner and outer circle together within the pile.

Wood stacks in the round. The foreground stack is under construction. Note that some of the wood is turned at a 90 degree angle in the stack to allow for an interior arrangement of wood that helps to lock the pile together. In the finished pile in background you can see the last layer of wood has been turned bark side up.

This shows a closeup of how I interlock the wood within the pile. In the foreground is a log turned at a 90 degree angle to the others in the front, and you can see the wood log just to the upper right of this that is then placed across the boundary of the inner and outer circle of logs. These inner logs help lock the inner and outer circle together within the pile.

This shows a closeup of how I interlock the wood within the pile. In the foreground is a log turned at a 90 degree angle to the others in the front, and you can see the wood log just to the upper left and right of this log in the front that are then placed across the boundary of the inner and outer circle of logs. These inner logs help lock the inner and outer circle together within the pile.

Empty center hole showing placement of horizontal wood poles added at 90 degree angles as the pile is built to increase stability. I am standing on the pile to take this picture, showing how stable this wood pile is.

Empty center hole showing placement of horizontal wood poles added at 90 degree angles as the pile is built to increase stability. I am standing on the pile to take this picture, showing how stable this wood pile is.

Happy stacking!