
Tags
As I have mentioned before, we have a number of different wine varieties in one vineyard. Some of these varieties are not of sufficient number to make varietal wine, so I am in the process of consolidating and removing these varieties from this vineyard. The most economical means of doing so is to top graft the old vine trunks of one type with the new desired variety. An ideal time to graft where we live is mid to late March.
There are many ways to graft older wine stock. These include a cleft graft, chip budding, a bark graft, or a whip graft modified for older and larger vines.
A cleft graft is the easiest to learn to do, however it has drawbacks which can include its large cleft in the center of the vine which, being major surgery on the vine’s stem, can open the vine to disease, and scions in a large cleft can be unstable and they might be knocked free.
To keep the easy parts of the cleft graft technique, but to reduce its drawbacks, I introduce below a modified cleft graft method where two small cuts are used rather than one large cleft.
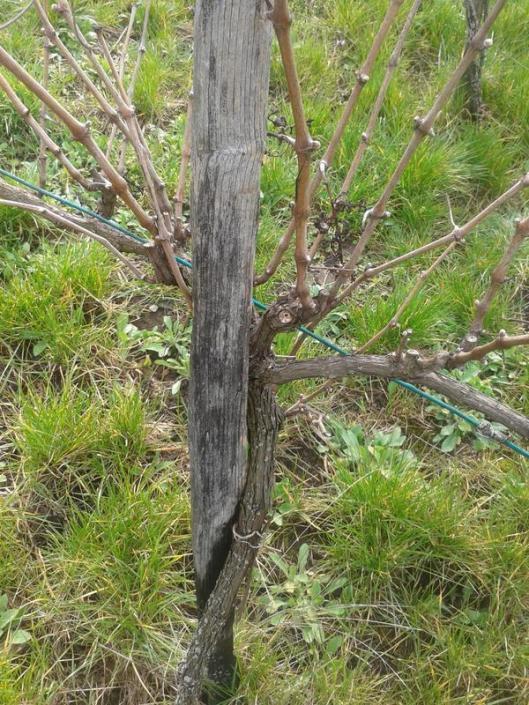
Select the wine vine to graft.
Cut the vine below the trellis wire at an appropriate distance. Here I cut the vine about 25 cm (10 in) below the trellis wire.

Removing the head part of the vine leaves what is now referred to as the rootstock.
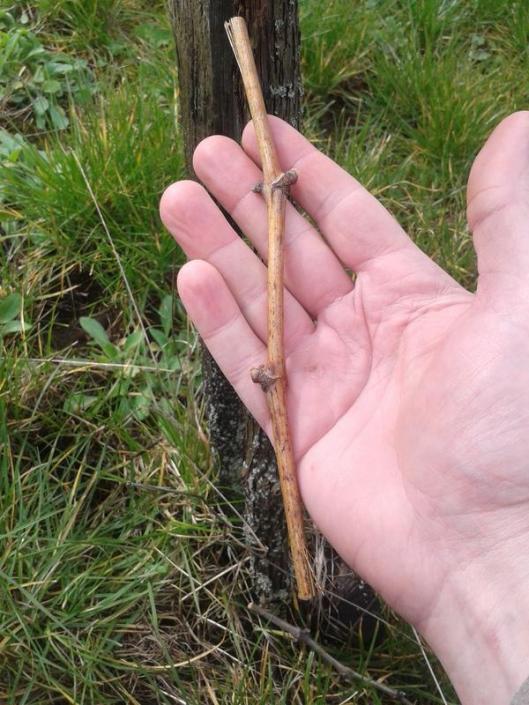
The new variety to be grafted onto the rootstock is a short piece of vine with just two nodes called the scion. This was trimmed earlier in the year from existing vines on the property and kept in cold storage until the day it was to be grafted to the rootstock. Note: before you proceed with any cuts on the scion, as described below, make sure to identify the bottom end of the scion, which is the end which the two nodes point up and away from.

The lower end of the scion is trimmed with a sharp knife into a wedge shape.

The wedge cut on the scion shown from a different angle than above. Trim two such scions.

Make two short cuts into the rootstock on opposite sides. The width of these small cuts should not be more than twice the width of the scion.

Insert the cut wedge of a scion into one of the cuts in the rootstock. Try to line up the xylem and phloem boundaries between the scion and the rootstock as this is where cambium layer is located.
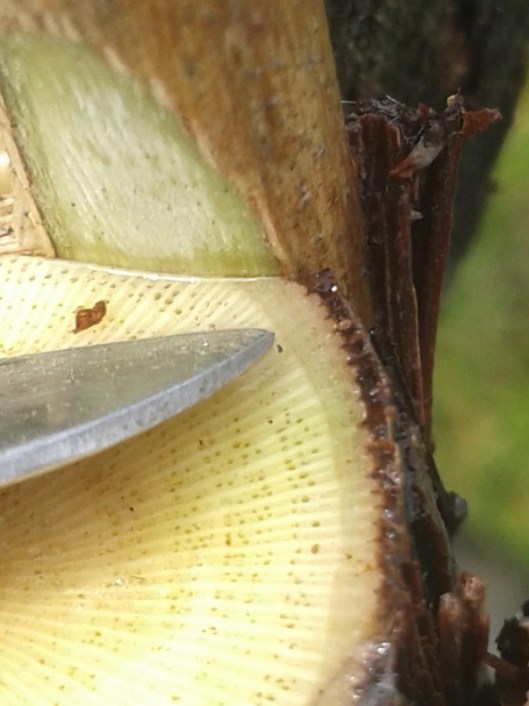
Most guides on grafting say to line up the cambium layers on the scion and rootstock. But this is for most practical purposes nearly impossible to do visually since the cambium is only a few cells, or fewer, thick and not necessarily visible to the human eye. But the cambium is located between the xylem and phloem layers and the xylem-phloem boundary where the cambium is located is usually easy to discern. In the photo above this boundary is shown at the tip of the knife, which should also be the cambium layer. So try to line up this xylem-phloem boundary on both the scion and the rootstock.
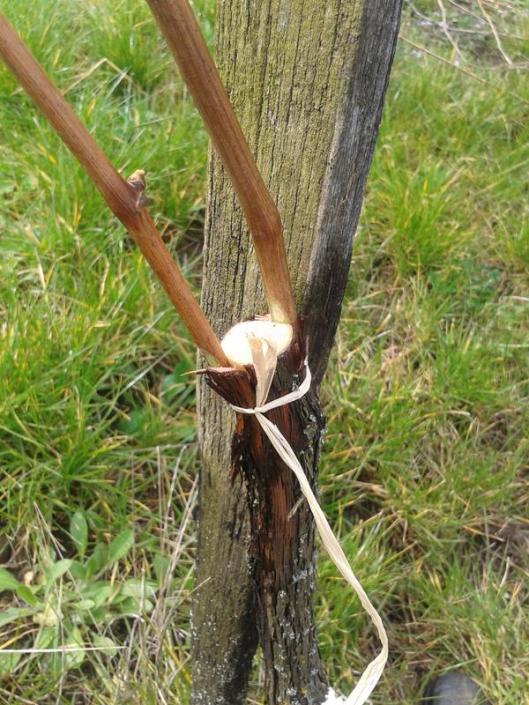
With the two trimmed scions placed into each cut on opposite sides of the rootstock, start to fix them in place with either binding tape, or as I have done above using raffia. At this point you can gently press or tap the scions into the cuts to set them well into their new position.

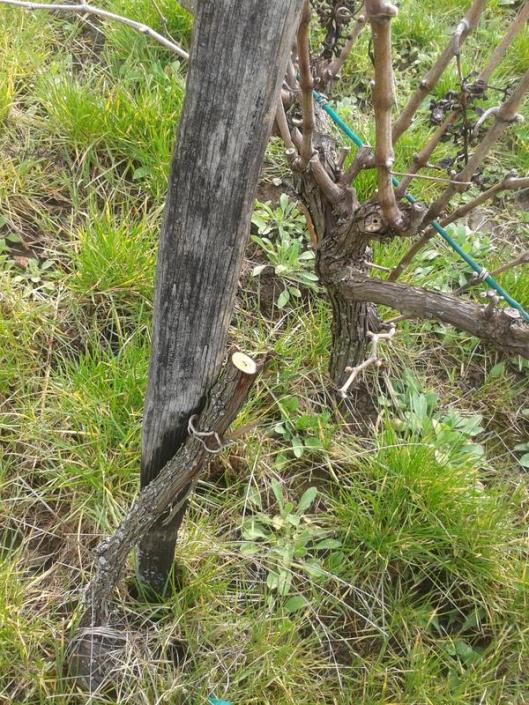
The finished graft snuggly wrapped with raffia. Remember to wrap the graft snuggly so to help force the rootstock and scion tissues together to help improve the chances of a successful graft.

Finally coat the entire graft and raffia with grafting sealant. My sealant is blue until it drys, then it turns brown.

The finished graft.

The graft some weeks later, after tilling in the vine row, and displaying the new growth on the scions, showing that the grafting was successful.

You must be logged in to post a comment.